
Before You Paint: The Wall Prep Tips Nobody Talks About
- Home & Interior Journal

- Jul 28, 2025
- 11 min read
Painting Soon? Interior Designers in Goa Share the Wall Prep Tips You’ve Probably Missed
Understanding the Importance of Wall Preparation
Wall preparation is a fundamental step that often goes overlooked in the painting process. Many individuals assume that simply applying paint to a clean surface is sufficient for a successful finish. However, this misconception can lead to a myriad of problems, highlighting the essential nature of proper wall prep to achieve optimal results. One of the primary benefits of wall preparation is its ability to enhance paint adhesion. When walls are not adequately prepped, the paint may struggle to bond effectively, increasing the risk of peeling and chipping over time. This is particularly relevant in humid climates, such as Goa, where moisture can further exacerbate paint deterioration.
Additionally, thorough wall preparation contributes significantly to the longevity of the paint job. Surfaces that have been correctly cleaned, patched, and primed ensure a smoother application, resulting in a more resilient and attractive finish. This meticulous effort translates into less frequent touch-ups and repaints, saving both time and money in the long run. Engaging professional interior designers in Goa for home projects can further enrich this process, as they bring expertise in evaluating and preparing wall surfaces tailored to the specific demands of each project. Ceiling and wall imperfections, such as cracks and stains, can greatly influence the final result, making the role of professional preparation indispensable.
Ultimately, investing time in wall preparation can yield remarkable rewards. By ensuring that surfaces are properly primed and treated, homeowners can achieve not only greater aesthetic appeal but also an enduring finish that withstands the test of time. Word of mouth often highlights the performance of the best interior designers in Goa, who consistently emphasize the significance of preparation to their clients. Hence, while it may be an unglamorous aspect of painting, proper wall preparation is perhaps one of the most critical elements leading to successful home transformations.
Assessing Wall Condition: Key Elements to Consider

Before embarking on the painting journey, evaluating the condition of your walls is paramount. This preliminary step can save time, effort, and resources by ensuring that any underlying issues are addressed prior to applying a fresh coat of paint. One of the first aspects to check is the presence of cracks. These can develop due to settling or temperature changes and can compromise the integrity of the finished look. Inspect both minor hairline cracks and larger fissures, as they may indicate deeper structural issues that could lead to complications later. For more serious cracks, it may be wise to consult with renowned Interior designers in Goa who can offer expert advice on how to manage these concerns effectively.
Another common issue is holes or dents, which may arise from previous wall hangings or impacts. These imperfections are relatively easy to repair but are essential to address before painting. Use a spackle or wall filler to smooth over these areas and ensure they are flush with the surrounding wall. Sanding down the area afterward can create a seamless finish that your chosen paint will adhere to more effectively.
Mold and mildew can be another hidden threat lurking beneath the surface. Assess any water stains or discolorations, as these can indicate moisture issues. Prior to painting, it is crucial to treat any mold present using suitable cleaning solutions to prevent it from re-emerging under your new paint job. Additionally, for those in search of expert assistance, the best interior designers in Goa can guide homeowners in effective prevention strategies.
The use of diagnostic tools, such as moisture meters and levelers, can enhance your wall assessment process. These instruments will help determine the current state of your walls, ensuring that you are well-prepared for painting. By taking these preliminary steps, you will enhance the overall aesthetics of your space and potentially increase its value.
The Right Tools for Wall Preparation

Preparing walls for painting is a crucial step that significantly influences the final outcome. Having the right tools can make a remarkable difference, ensuring a smooth, professional finish. Essential tools for wall preparation include scrapers, sanding blocks, patching compounds, and cleaning materials. Each of these tools plays a vital role in achieving the best results while painting.
Scrapers are fundamental for removing old paint, wallpaper, or any imperfections from the wall surface. A quality scraper allows for effective removal without damaging the underlying surface. Choose a scraper with a comfortable handle and sturdy blade for optimal performance, as these are critical features that contribute to a smoother preparation process.
Sanding blocks and sandpaper are equally important for smoothing out any rough spots after scraping. Ensure that the sandpaper is of the right grit; fine-grit sandpaper is excellent for smoothing surfaces, while a coarser grit is great for stripping away stubborn areas. For larger areas, consider using a sanding pole to extend your reach, providing efficiency and ease during the preparation.
Patching compounds come into play when filling in holes or cracks. Select pre-mixed options for convenience or powdered versions for a customizable consistency. Applying the compound correctly with a putty knife is essential; a good quality knife will ensure an even application. Allow ample drying time before sanding to achieve a flawless surface. Lastly, cleaning materials such as degreasers and sponges should not be overlooked. A clean wall is necessary for proper paint adhesion, and high-quality cleaning supplies will help you remove dust, grease, or residue effectively.
Incorporating these tools into your wall preparation process is an investment that pays off in the long run. Whether you're planning to hire interior designers in Goa for home transformation or exploring options among the top 10 interior designers in Goa, ensuring your walls are prepped properly is vital. Quality tools not only streamline the process but also significantly enhance the final finish.
Cleaning the Wall: Techniques and Best Practices
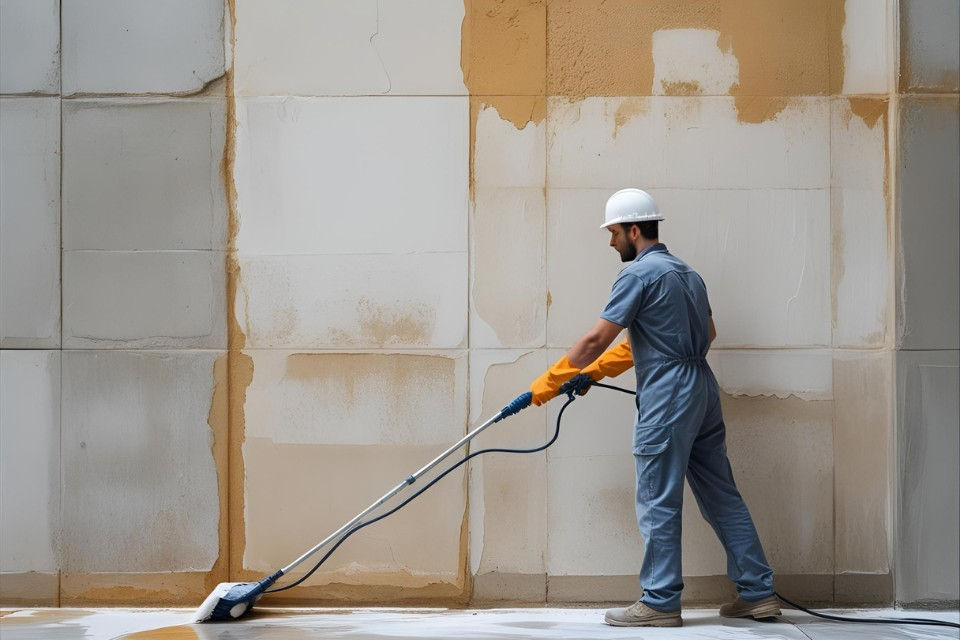
Before embarking on a painting project, it is crucial to recognize the significance of thoroughly cleaning walls. This step is essential to ensure that paint adheres properly and that the finish appears flawless. Different wall surfaces require specific cleaning techniques, which interior designers in Goa often emphasize to their clients, especially when aiming for high-quality results.
One of the most common initial steps in wall preparation is dusting the surface. A dry cloth or a vacuum with a brush attachment can be employed to eliminate dust and cobwebs. For more stubborn grime, especially in kitchens or high-traffic areas, the use of a degreaser or a mixture of warm water and mild detergent can be highly effective. It is recommended to test cleaning solutions on a small, inconspicuous area to ensure that they do not damage the paint or wall surface, a practice often advised by the famous interior designers in Goa.
The techniques for cleaning may vary based on the type of wall. For example, textured surfaces may require a soft brush or sponge to reach all nooks and crannies, while smooth finishes can be wiped down with a damp cloth. Additionally, it is important to avoid excessive water on surfaces that can absorb moisture, such as drywall. As a preventative measure, cleaning walls should be part of a routine upkeeping every few months, depending on the area’s exposure to dirt and debris.
Ultimately, effective wall cleaning is a foundational step that not only prepares surfaces for painting but also enhances the longevity of both the paint and the overall aesthetic. By employing proper techniques and engaging with interior designers in Goa for home projects, homeowners can ensure they achieve the best results possible, setting the stage for a successful painting endeavor.
Repairing Wall Imperfections: Patching Holes and Cracks

Before commencing any painting project, it is crucial to address wall imperfections such as cracks and holes to ensure a smooth and aesthetically pleasing finish. This step can significantly enhance the overall appearance of your interiors, an aspect often highlighted by top interior designers in Goa. Proper wall preparation allows for an even paint application and is fundamental to achieving a professional result.
To begin repairing holes, the first step is to clean the area surrounding the imperfection. Remove any loose debris or paint using a putty knife. For small nail holes, a simple spackling compound is suitable. Apply a small amount of spackle directly into the hole using the putty knife, pressing firmly to fill it completely. For larger holes, the use of a joint compound may be necessary. In this case, you may need to embed a piece of mesh tape over the hole for added support. Smooth the joint compound over the tape and the surrounding wall area to create a flush surface.
Once you have applied the spackle or joint compound, allow it to dry as per the manufacturer's instructions—typically, this can range from a few hours to overnight. To ensure a flawless surface, sand the patched areas lightly with a fine-grit sandpaper until they are smooth and level with the surrounding wall. If needed, a second layer of joint compound may be applied and then sanded again for perfection. Remember, achieving a seamless finish is essential, as emphasized by famous interior designers in Goa, particularly for home interiors where imperfections are more noticeable.
Finally, after sanding, wipe the area with a damp cloth to remove any dust before painting. This meticulous approach to preparing your walls not only aligns with best practices used by top interior designers in Goa but also guarantees a polished look upon completion. Addressing these cracks and holes will lay the foundation for an excellent paint job and ultimately enhance your living spaces.
Sanding the Walls: Why It’s Often Overlooked
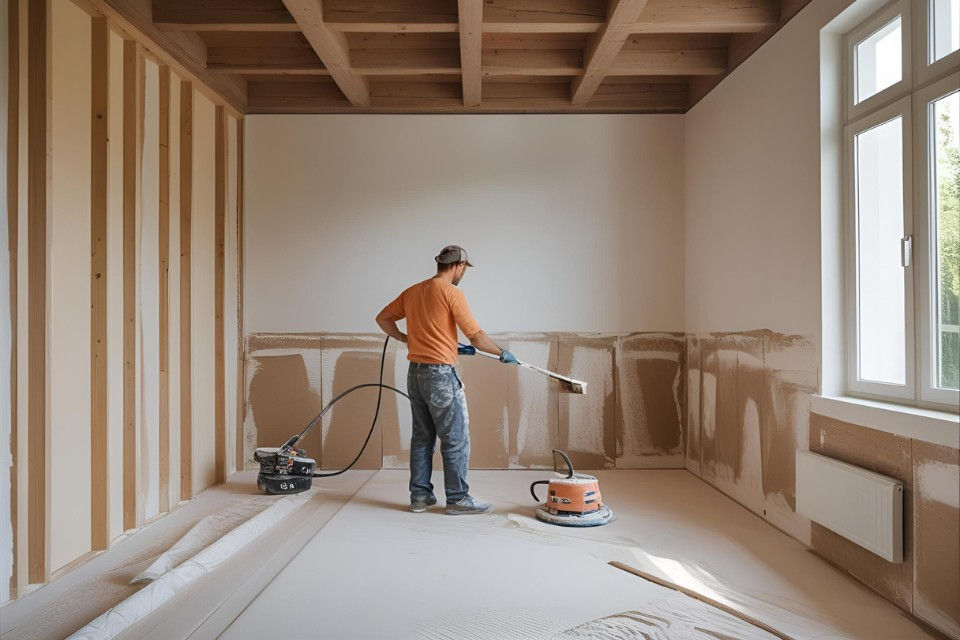
Sanding the walls is a critical step in the painting process that is frequently disregarded, but it plays a significant role in achieving a smooth and professional finish. Many homeowners may skip this crucial step, believing that painting over an uneven surface will suffice. However, proper wall preparation, particularly sanding, can make a marked difference in the overall appearance of the final coat. Interior designers in Goa have recognized the importance of this technique, often urging clients to invest the necessary time in sanding their walls.
When it comes to sanding techniques, a systematic approach is essential. The general rule of thumb is to start with a coarse grit sandpaper, usually around 80 to 120 grit, particularly for surfaces like drywall that have not yet been painted. This initial sanding will help to remove any imperfections, bumps, or old paint flakes. Following this, a finer grit sandpaper, ideally 220 grit, should be used to create a smooth finish that will enhance paint adhesion. For plaster walls, a slightly different approach may be necessary, as the material is softer and can be damaged easily. Using a lightweight sanding sponge helps to distribute pressure evenly, minimizing the risk of breaking through the surface.
Understanding the material of your walls is crucial. Different surfaces may require various types of sandpaper and techniques; for instance, drywall typically benefits from a light knockdown of high spots, while plaster may need a gentle touch to avoid damaging it. Regardless of wall material, the goal remains the same: to generate a flawless surface that will allow the paint to adhere properly, resulting in an attractive and long-lasting finish. Ultimately, enlisting the expertise of interior designers in Goa for home-related projects can ensure a high standard of wall preparation. This investment in sanding could very well be the difference between a mediocre and a standout aesthetic.
Priming: When and Why You Should Use It

Priming is a crucial step in the painting process that often goes overlooked. It serves as an intermediary layer between the wall and the paint, significantly affecting the outcome of the project. Interior designers in Goa frequently emphasize the importance of this step, especially when dealing with surfaces that require special attention. There are several scenarios in which priming is essential. For instance, if you are painting over a previously painted surface with a different color or type of paint, priming can help ensure better adhesion and a more uniform finish. Additionally, if you are working with porous surfaces such as drywall or raw wood, using a primer can prevent the paint from soaking in and provide a smoother finish.
There are various types of primers available, each designed for specific situations. Latex primers are suitable for most surfaces, while oil-based primers work best on stains and glossy finishes. Understanding the essence of property types is crucial when selecting a primer, as this can save you time and resources during a painting project. For homeowners seeking to hire the best interior designers in Goa, asking about their priming practices can shed light on their expertise and attention to detail.
Applying primer correctly is integral to achieving optimal results. Ensure the surface is clean, dry, and free from dust before application. Using a high-quality brush or roller can facilitate even coverage, and it’s advisable to allow adequate drying time before applying the paint. The benefits of priming are manifold, including improved paint adhesion, enhanced color coverage, and prolonged durability of the paint job. These advantages make it clear why even the most famous interior designers in Goa insist on this preparatory step. By incorporating effective priming techniques, you can ensure your painting project stands the test of time and maintains its aesthetic appeal.
Protecting Surfaces: Masking and Covering Techniques

Before embarking on a painting project, it is imperative to prioritize the protection of your surfaces. This process ensures that furniture, flooring, and trim remain undamaged, allowing for a clean, professional finish. One of the most fundamental techniques to consider is the application of painter's tape. This specialized tape is designed to adhere well to surfaces while offering the flexibility to be removed easily without leaving residue. To achieve crisp lines, apply the tape along the edges where different colors will meet, ensuring that it is pressed down firmly to prevent paint seepage. Removing the tape while the paint is still slightly wet can enhance the edge quality further.
In addition to painter's tape, the use of drop cloths is essential in shielding floors and furniture from splatters and spills. These materials are available in various types, including canvas, plastic, and paper. For optimal protection, choose heavyweight canvas drop cloths; they absorb drips and provide a reliable barrier. Alternatively, plastic drop cloths are lightweight and repel water, making them useful for quick projects, though they may not secure surfaces as effectively as canvas. Cover all furniture and flooring thoroughly, ensuring that no areas are left exposed.
Moreover, employing plastic sheeting can be beneficial for large-scale projects, particularly in protecting appliances, cabinetry, and intricate trim. Secure the edges with painter’s tape to prevent any movement during the painting process. Pay special attention to areas like corners and edges that require precise coverage. By implementing these masking and covering techniques, you can effectively safeguard your home during your painting endeavors, reducing the risk of undesirable paint drips on unintended surfaces. Overall, preparing your environment with these precautions not only leads to better results but also enhances the overall painting experience.
Final Checklist: Ensuring You're Ready to Paint
As you approach the final steps of your wall preparation, it is crucial to implement a comprehensive checklist that ensures all necessary tasks have been completed before you begin painting. Proper preparation not only enhances the final appearance of your walls but also extends the longevity of the paint job. Below are essential points to consider as part of your final checklist.
First, ensure that you have thoroughly cleaned the walls. Dust, grease, and grime can significantly impact paint adhesion. Use a mixture of mild detergent and water to scrub the walls, and allow them to dry completely. If there are any stains or marks on the wall, treat these areas specially to guarantee they do not bleed through your new paint.
Next, inspect the wall for damages such as holes, cracks, or peeling paint. It is essential to repair these imperfections appropriately. For small holes, a suitable filler can provide a smooth surface, while larger cracks may require a more extensive repair process. Sand down any repaired areas to ensure they are level with the surrounding wall.
Another critical step is priming. Applying a suitable primer can make a substantial difference in the final outcome, especially on raw surfaces or where significant color changes will occur. The primary purpose of a primer is to create a uniform base for the paint, ensuring better adhesion and brighter final colors.
Finally, confirm that your workspace is adequately set up. Remove or cover furniture and floor surfaces with drop cloths to protect against spills. Ensure you have all necessary painting supplies on hand, including brushes, rollers, and painter's tape. Taking the time to verify these details allows you to transition seamlessly into the painting phase, achieving results akin to those crafted by the best interior designers in Goa.
In conclusion, systematic wall preparation is key to a successful painting project. By following this final checklist, you'll create an ideal foundation for your paint work, leading to the best results possible. Take pride in your effort as you take the next steps towards transforming your living space, much like the famous interior designers in Goa would suggest.


Comments